Halloween is creeping up fast!
Be the ghostess with the mostest this year with some of the top trending Pinterest Halloween recipes.
These eight creative and delicious recipes below are perfect for your own Halloween dinner party!
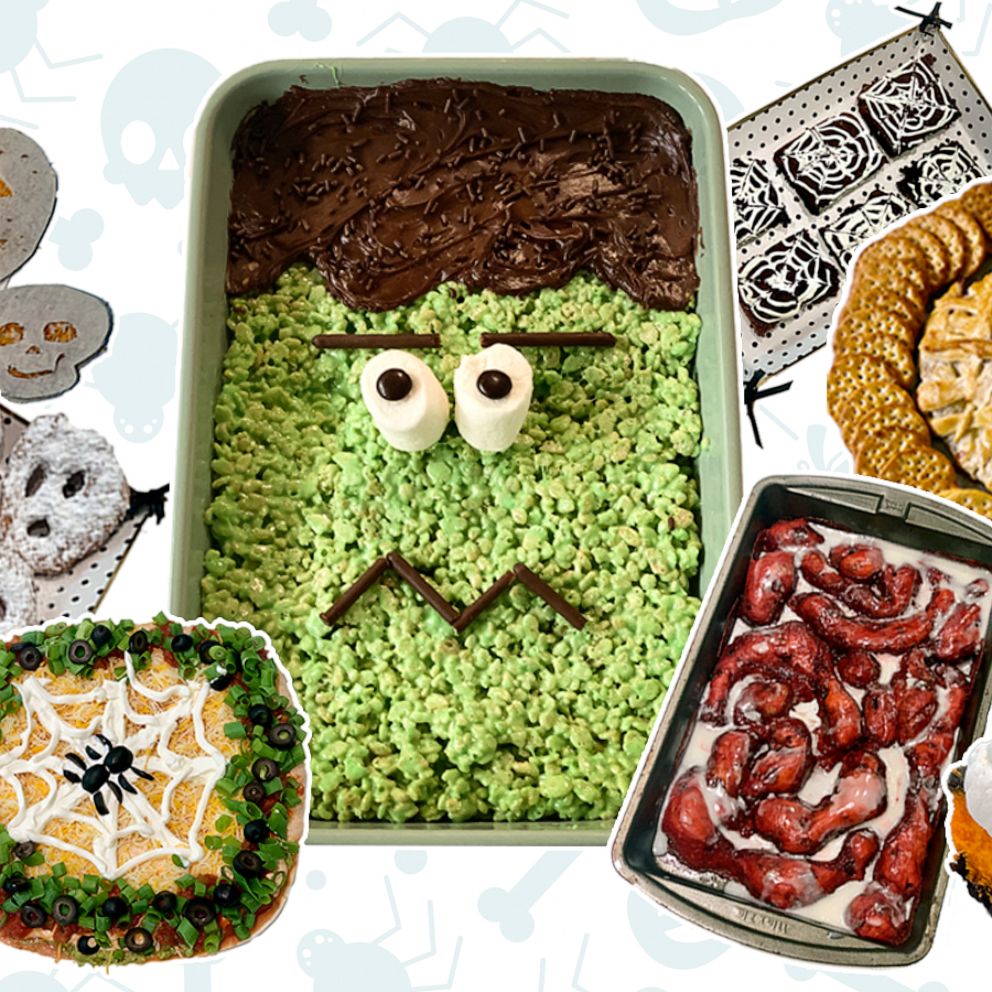
Giant Frankenstein Rice Krispie Treat
Recipe IRL:
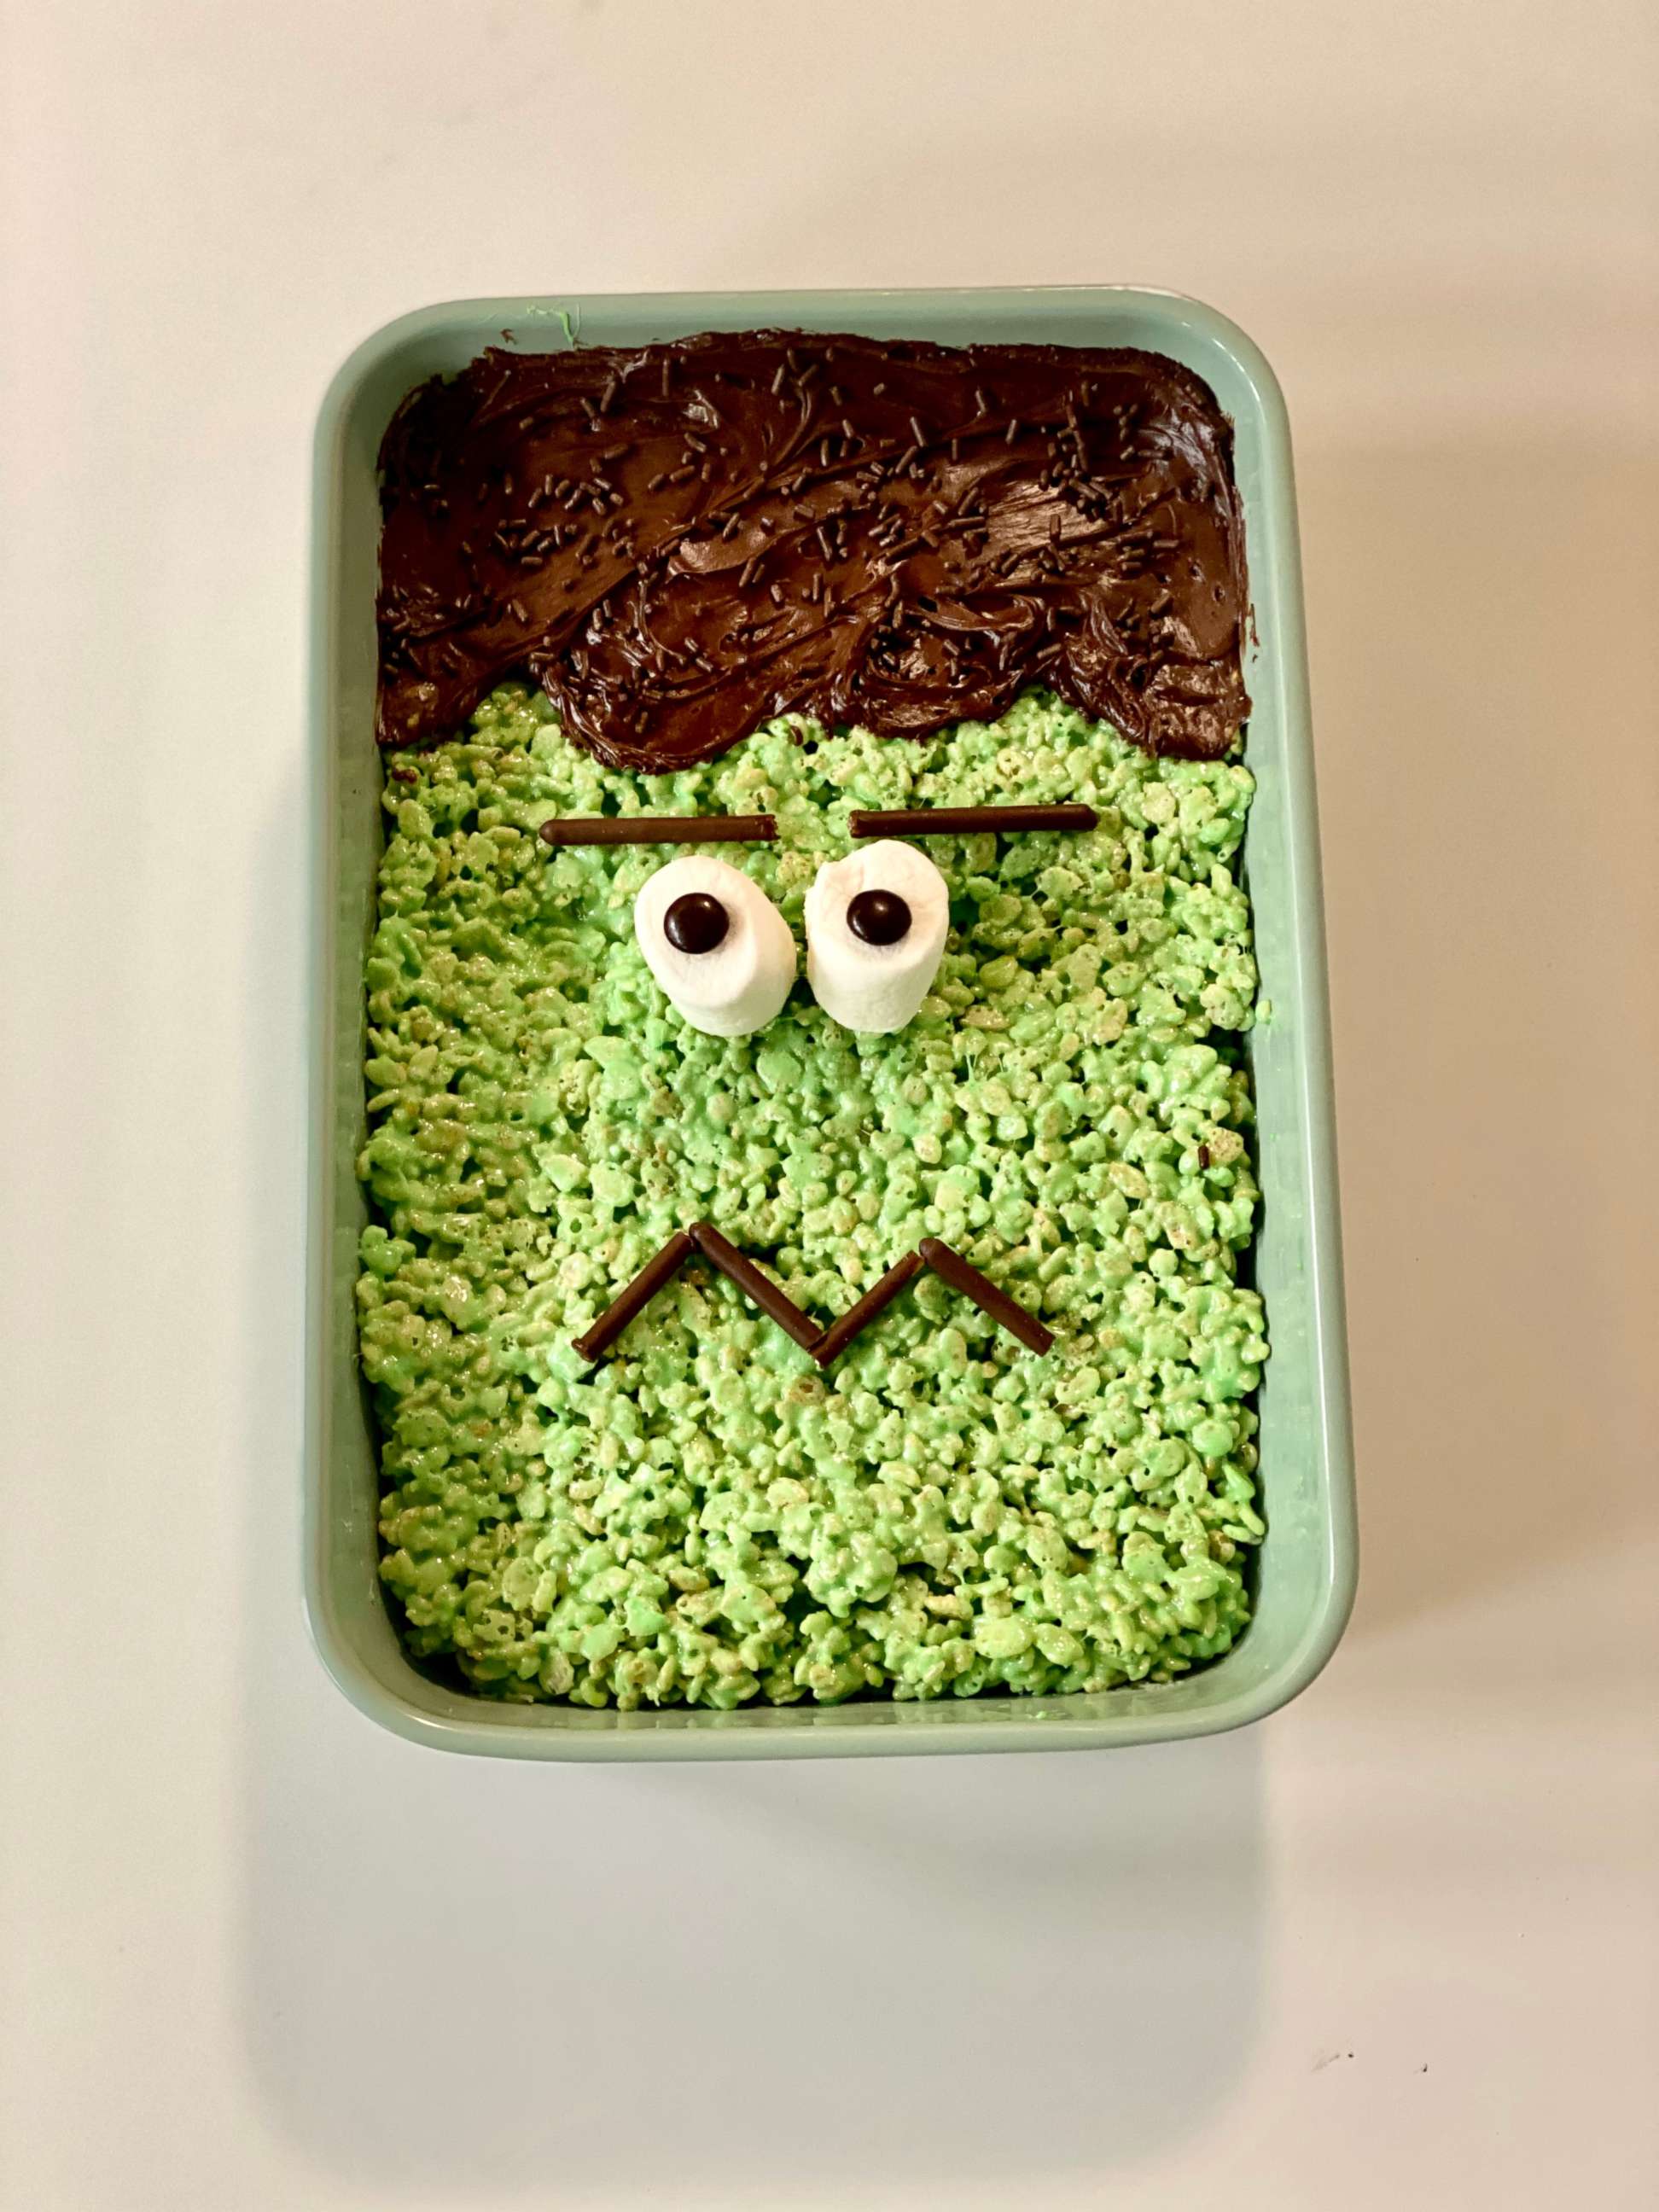
I haven't made homemade rice krispies treats since I was a kid so this one was especially fun for me. The recipe is super simple. I used the microwave to melt the butter and marshmallows together, added in some green food gel and then the rice krispies cereal. The recipe calls for nine cups of rice krispies cereal but I like my rice krispies to be extra gooey so I only used seven cups.
This is a great no-bake recipe that takes less than 10 minutes to make! As for decorating the Frankenstein, I used Pocky Sticks for the eyebrows and also the mouth instead of using melted chocolate or black frosting. I also used chocolate frosting for the hair instead of melting chocolate which I always make a mess of and/or burn! It was much faster and cleaner. You'll want to "bolt" down this yummy recipe. I highly recommend this one!
Ingredients
Green Rice Krispies
- 3/4 cup unsalted butter
- 1 1/2 10 ounce bags mini marshmallows
- green food dye
- 1/2 teaspoon pure vanilla extract
- 9 cups rice krispies generic brand works great too
Decoration
- 1/2 cup melted chocolate or chocolate frosting for the hair and mouth
- sprinkles
- 1 large marshmallow
- 2 brown m&ms or junior mints
- 1 pocky stick or you can use extra melted chocolate
Directions
- Prepare a casserole dish by greasing it with butter.
- In a large microwave safe bowl, add butter and marshmallows. Microwave in 30 second increments, let them get all big and poofy and then stir. Continue microwaving until melted.
- Add as much green food dye as desired and then add vanilla.
- Add rice krispies and gently stir. Dump into prepared pan and gently press flat using a buttered spatula.
- Let cool for a few minutes and then pour melted chocolate on to it to create the "hair" and sprinkle on chocolate sprinkles. Cut the large marshmallow in half and place the sticky side down to create "eyes." Use a little meted chocolate as glue to put on the M&M's as "pupils" and the pocky stick cut in two as eyebrows. Pipe on a mouth using melted chocolate or black food gel and enjoy!
Recipe reprinted courtesy of Your Cup of Cake.
Spiderweb Halloween Brownies
Recipe IRL:
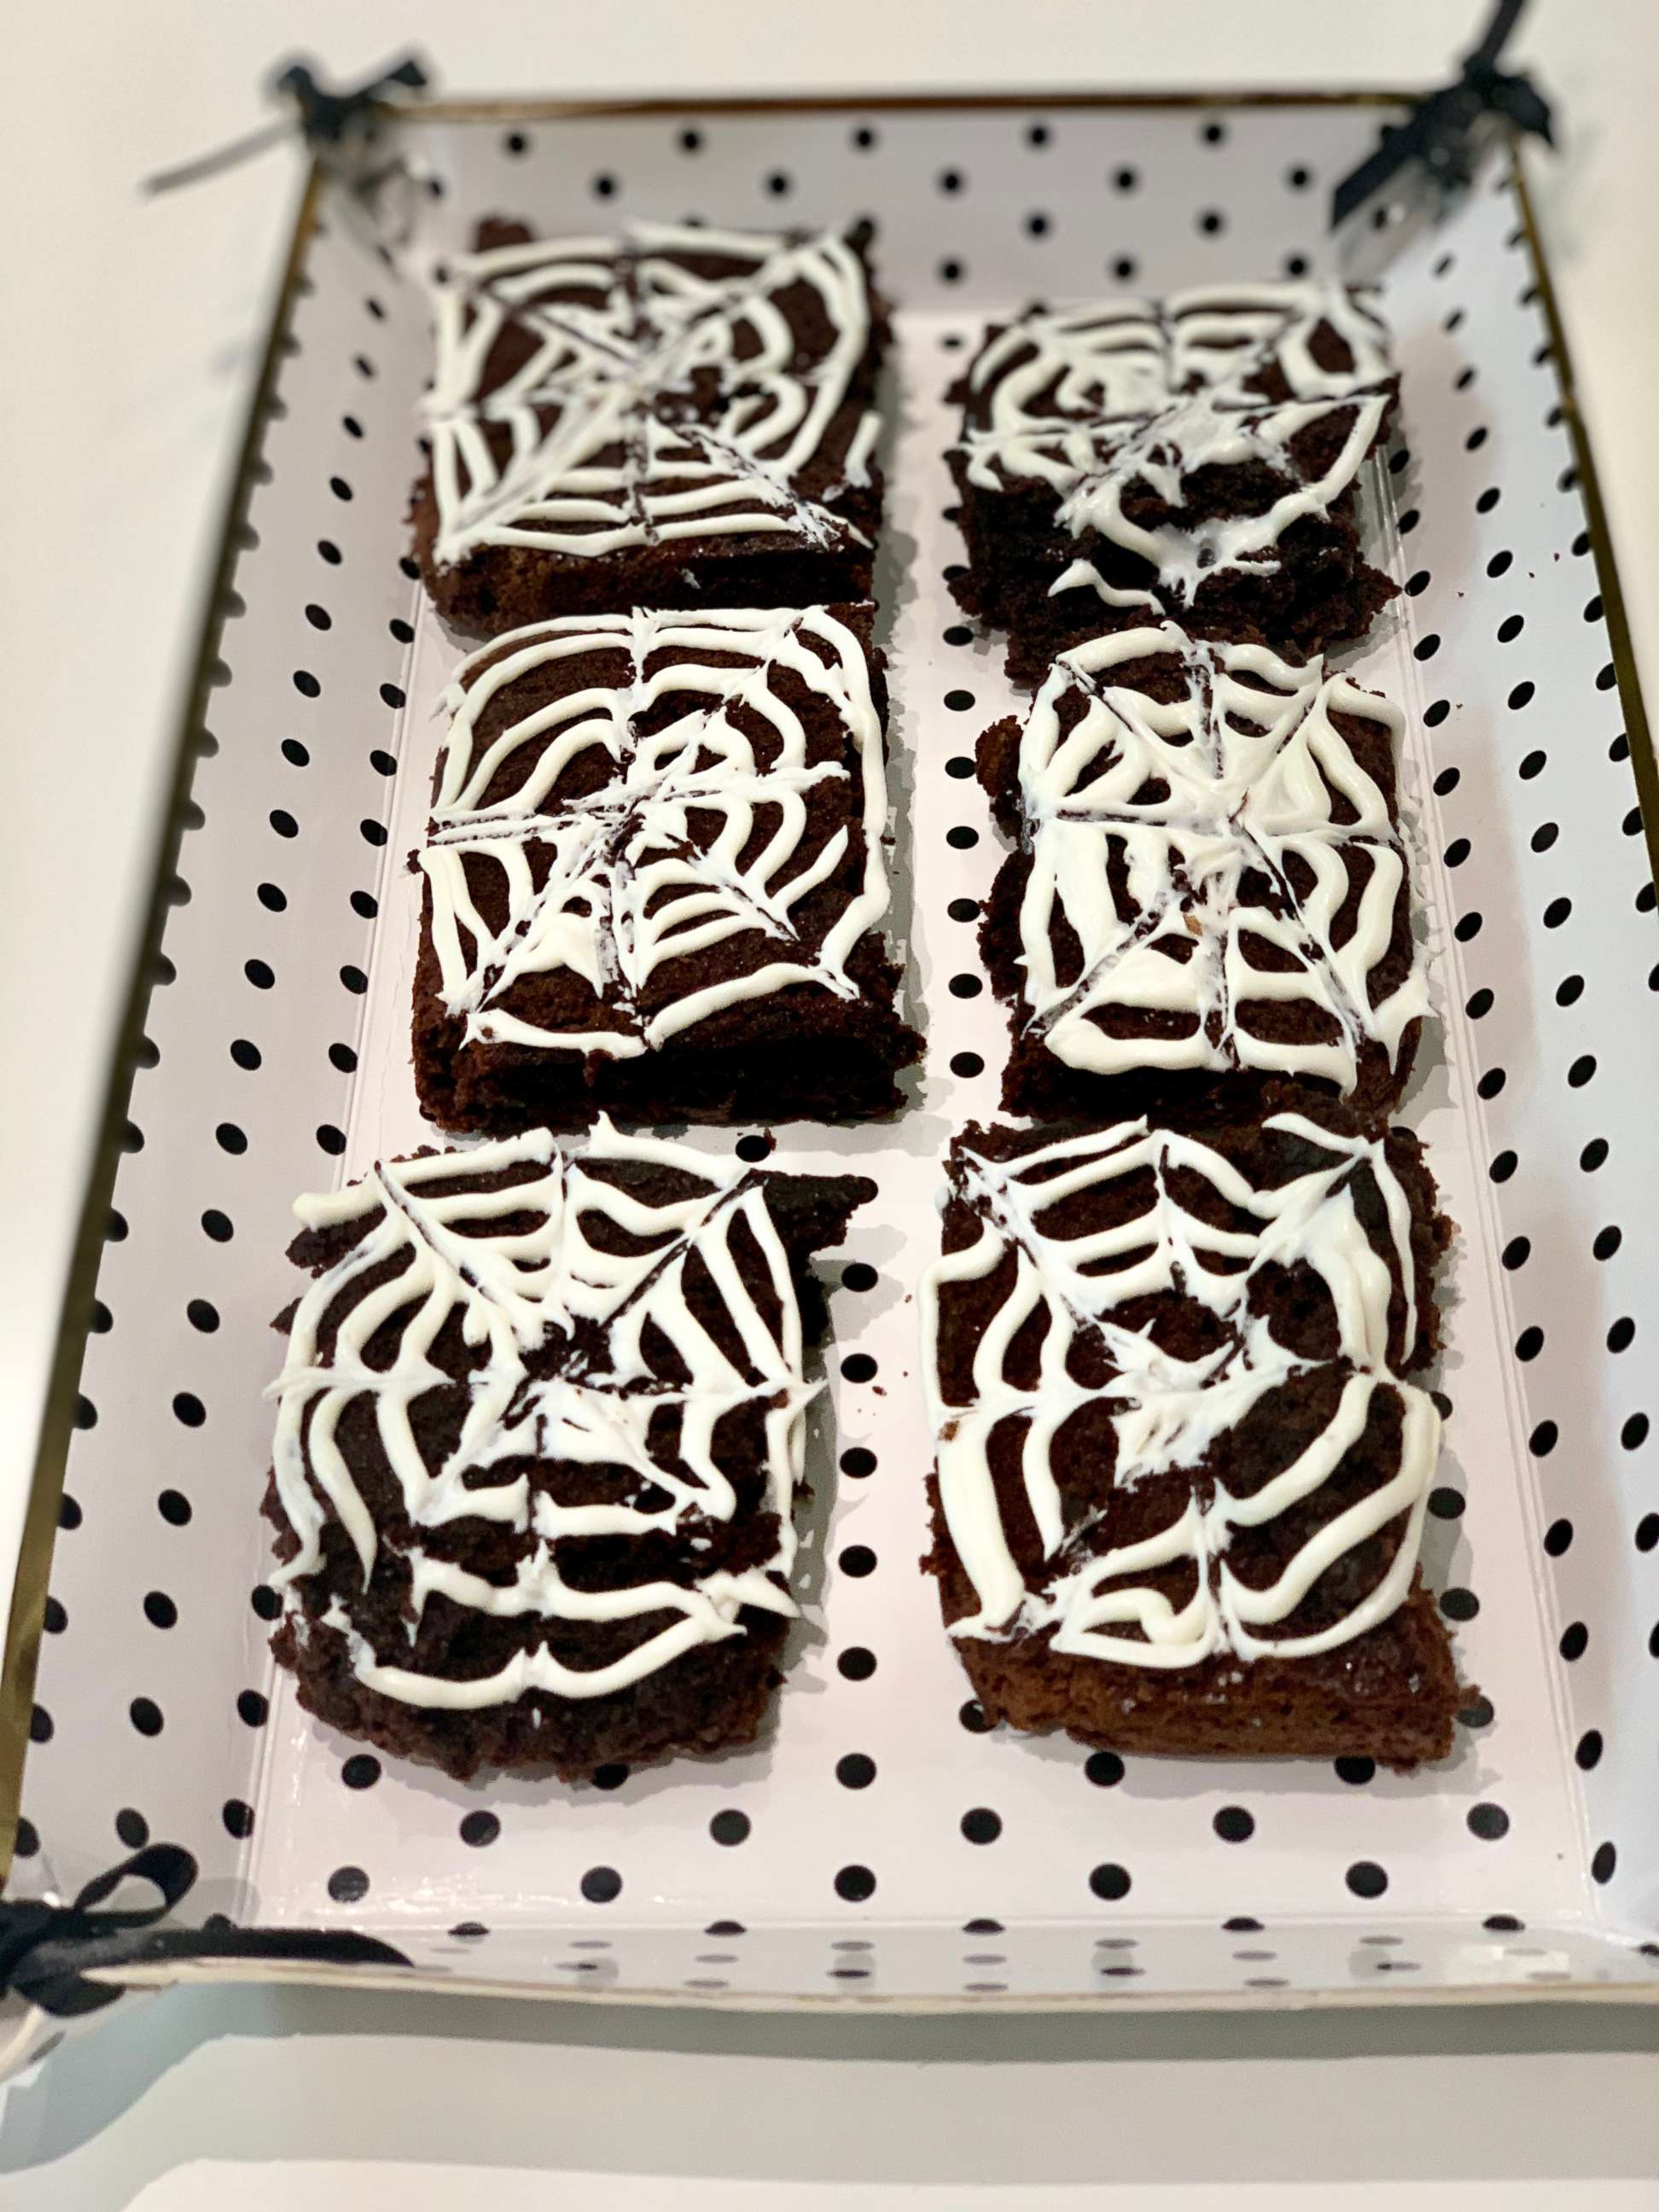
I loved the simplicity and decadence of this recipe. I used Betty Crocker Dark Chocolate Brownie Mix to make the brownies and it was as easy as ever. The brownies were a bit flaky on the top so in order to decorate them with icing I turned them over and used the bottom side to decorate instead. Because I was using the cakey bottom side, the frosting didn't glide as smoothly as it might have otherwise when making the lines for the spiderwebs so that's the only downside.
The brownies were so rich and delicious and the added frosting gave it a nice touch. I used Pillsbury Vanilla Creamy Supreme Frosting for my version. This is a very kid-friendly recipe and is also incredibly easy. I'd highly suggest making this for any Halloween occasion as you can whip it up in less than an hour! No tricks in this recipe - just the treat!
Ingredients
- 1 box of brownie mix
- vanilla frosting
Directions
- Preheat the oven to 350 degrees and line an 8×8 baking dish with parchment paper or foil (if you using foil, spray with non-stick cooking spray).
- Combine the brownie mix and ingredients.
- Pour the brownie batter into the baking dish and bake for 45-50 minutes.
- Insert a toothpick in the center of the brownies around 45 minutes, if it comes out clean the brownies are done.
- Remove from the oven and let cool.
- Once cool, cut the brownies into 9 squares.
- Scoop the frosting into a microwave-safe dish and heat for about 10 seconds.
- Fill the small sandwich baggy about 1/2 full with vanilla frosting. Use scissors to snip one corner.
- Starting at the center of each brownie, gently squeeze the sandwich baggy and make a spiral with the frosting.
- Use the toothpicks to drag the frosting from the center to the outer edges of the brownie. Repeat for all brownies.
Recipe reprinted courtesy of Alea Milham of Premeditated Leftovers.
Spiderweb Taco Dip
Recipe IRL:
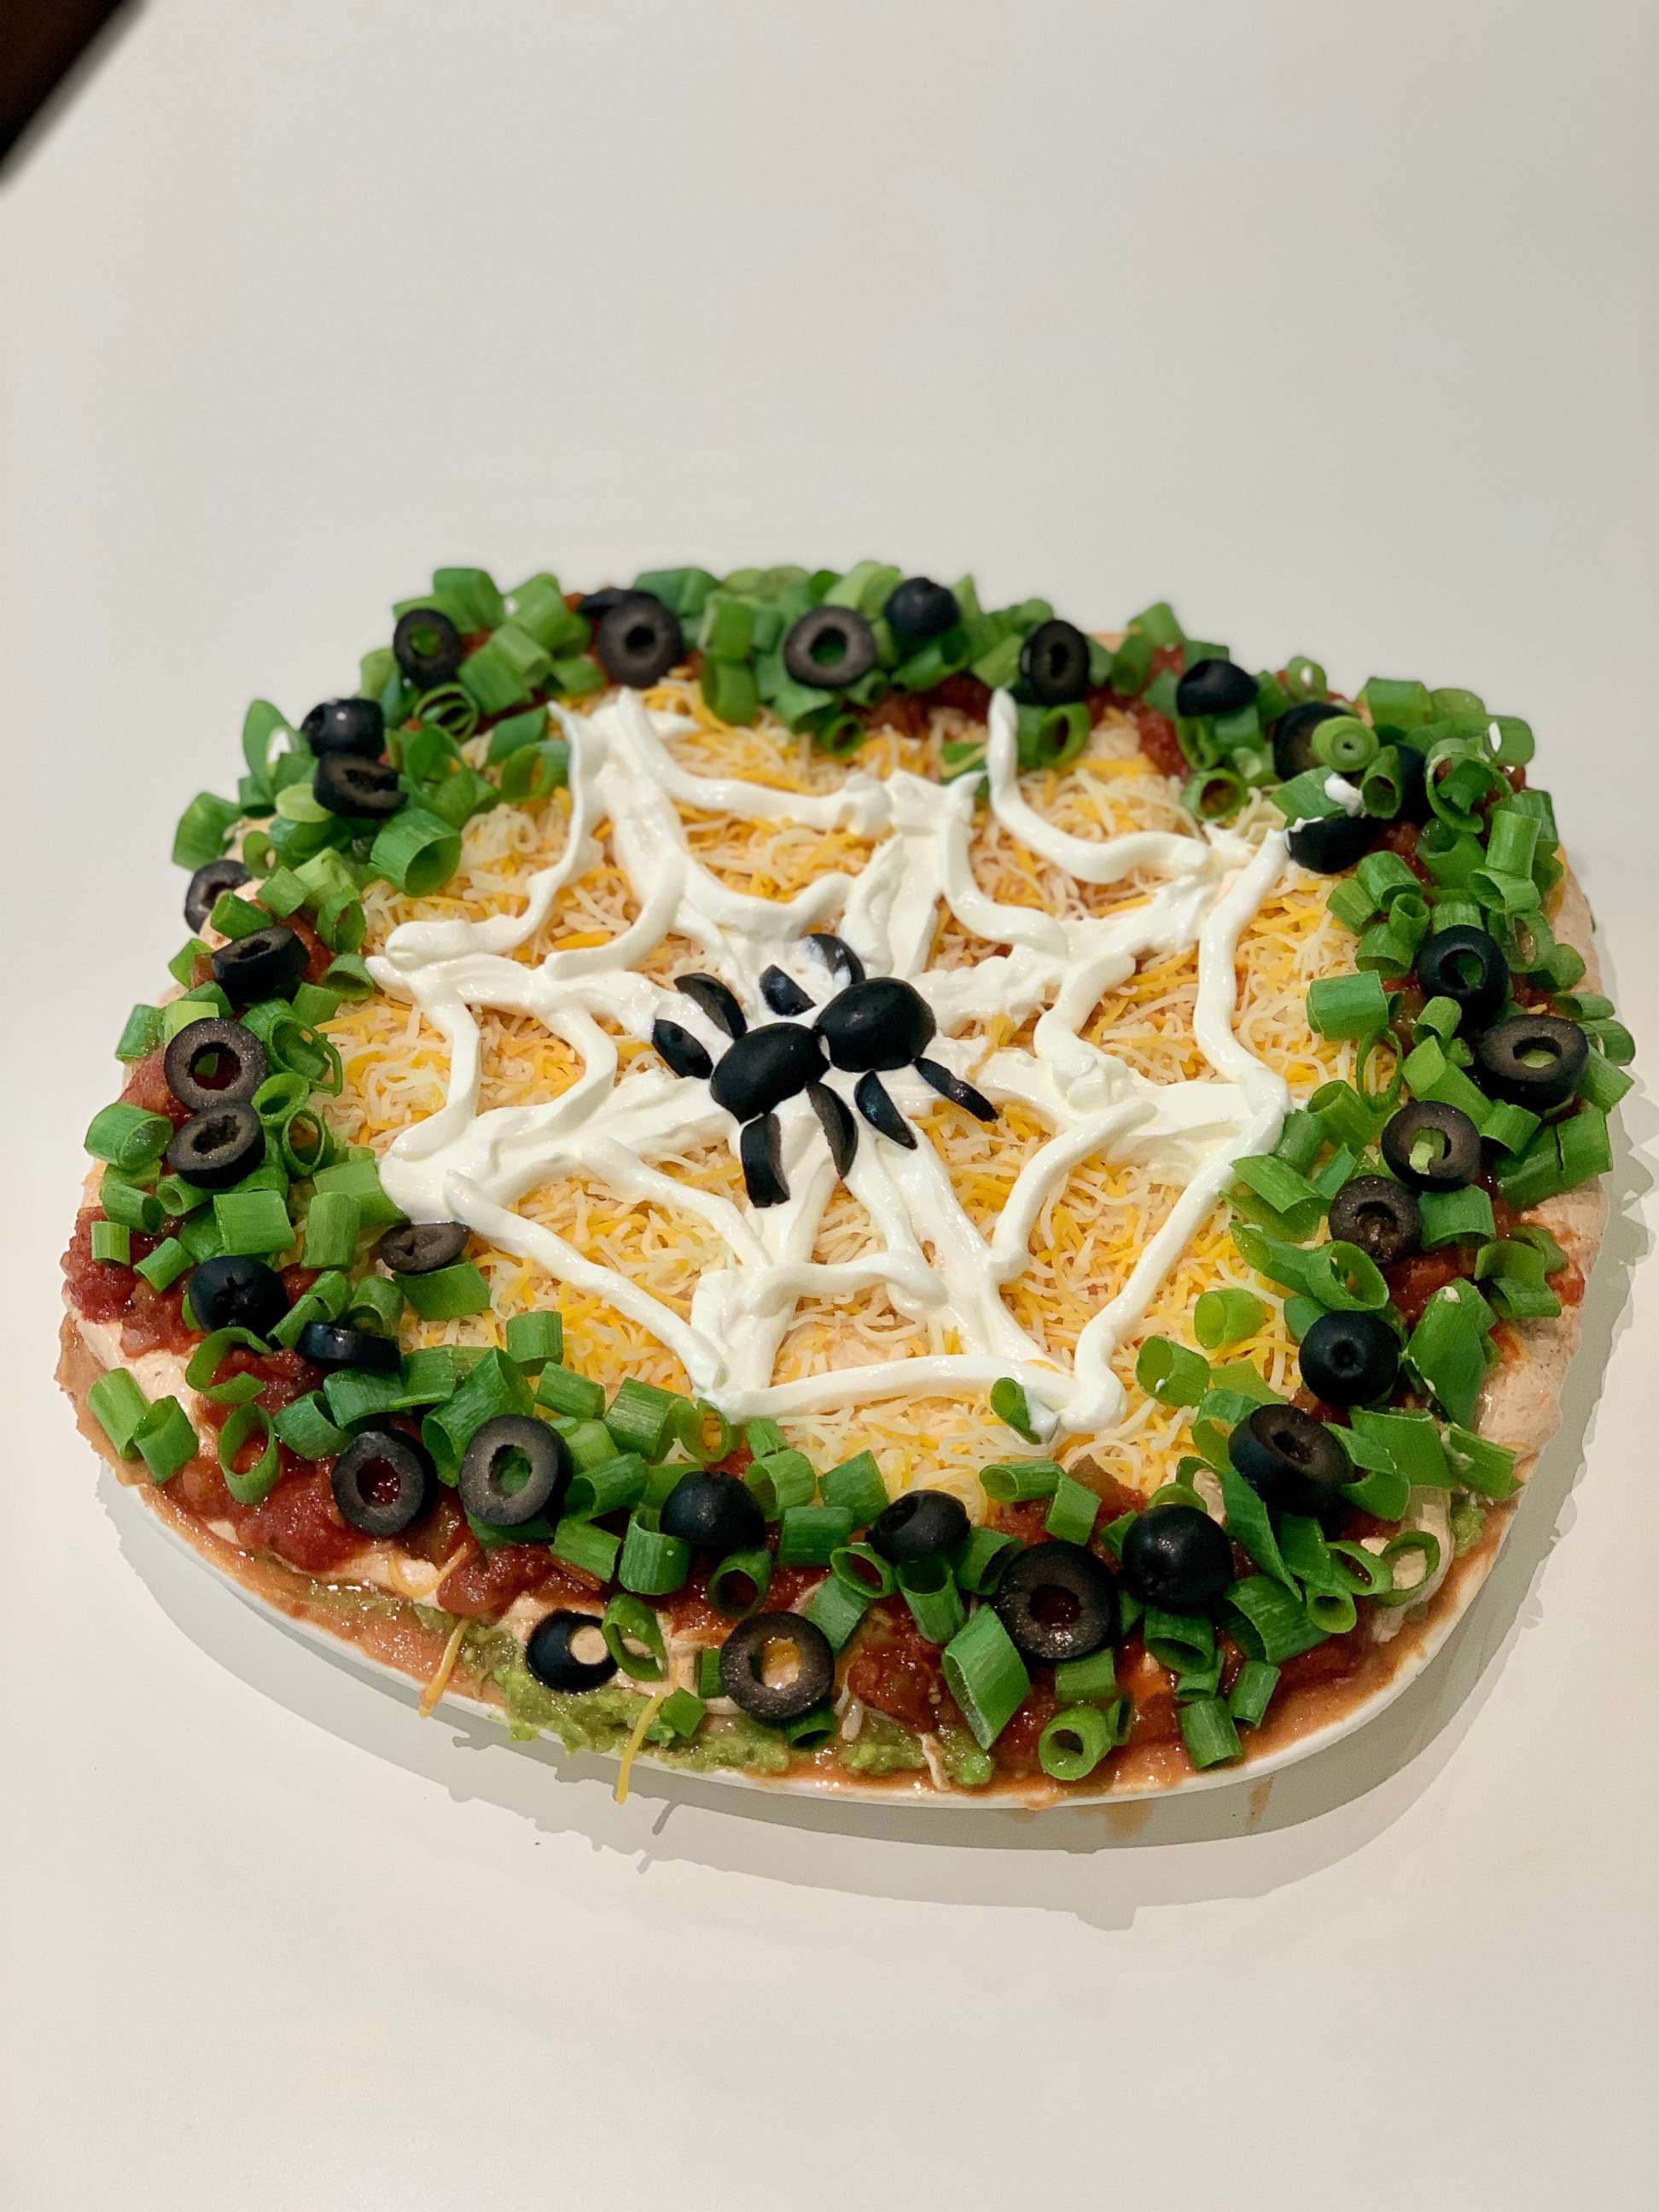
Now taco-bout a Pinterest winner! I love me some taco dip at any get together and having another no-bake recipe in the mix just feels like an extra win. This pin didn't come with a recipe so I actually just made this one up myself based on the photo and standard taco dip recipes. I used a layer of refried beans, guacamole, sour cream, cheese and topped with salsa, green onions and olives.
I feel like you can't go wrong with taco dip and it was definitely tasty. I didn't have a plastic spider on hand so I improvised by making a spider out of olives which I actually preferred since it was edible! Making this dish was a breeze and is the type of food that you could prepare the day or night before without worrying. Pro-tip: I arranged this on a curved plate but if I had to do it again I would opt for a bowl because it ended up getting messy and spilling over the edges.
Ingredients
- 1 bag shredded cheese
- 1 can refried beans
- 1 can black olives
- 1 bunch of green onions
- 1 16 oz sour cream
- 1 15.5 oz salsa
- 1 8ox guacamole or smash two avocados mixed with a half a cup of salsa
- 1 taco seasoning packet
Directions
- Spread the can of refried beans at the bottom of a bowl or a curved plate.
- Top that with a layer of guacamole.
- Mix the taco seasoning packet into 3/4 of the sour cream and spread over the beans and guacamole layers.
- Top that with a layer of salsa.
- Top with a layer of shredded cheese.
- Dice the green onions and olives and sprinkle on the edges of the dip.
- Put the rest of the sour cream in a ziplock bag, cut off the corner, and add the sour cream in the shape of a web.
- Cut the olives in the shape of a spider by cutting one olive in half and then thinly slicing two more olives to make the "legs."
Original pin courtesy of Best Friends For Frosting and original photo courtesy of Maddie Butterfield.
Mummy Wrapped Brie
Recipe IRL:
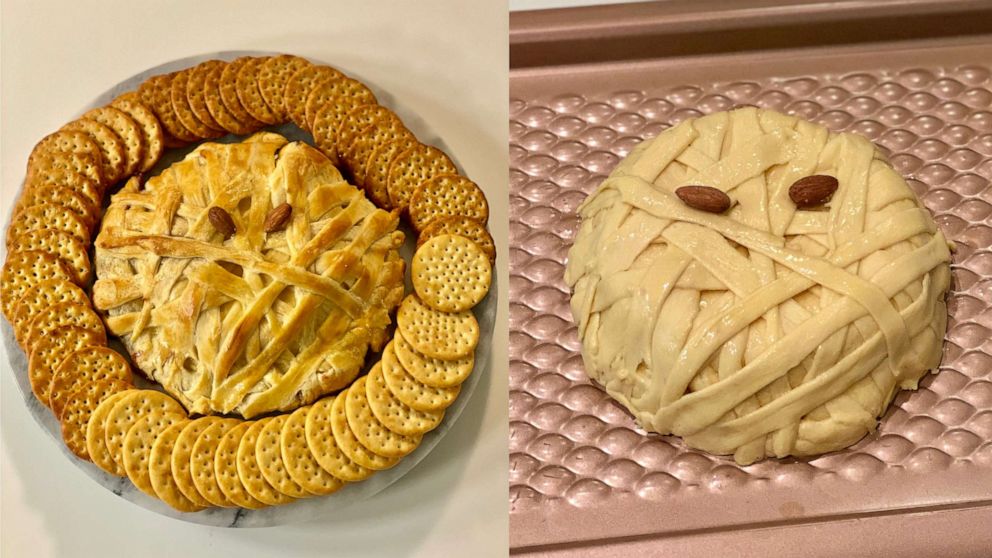
This recipe was incredibly easy and tasty. I highly suggest trying this as an appetizer or snack. This is more of an adult-friendly food than kid-friendly.
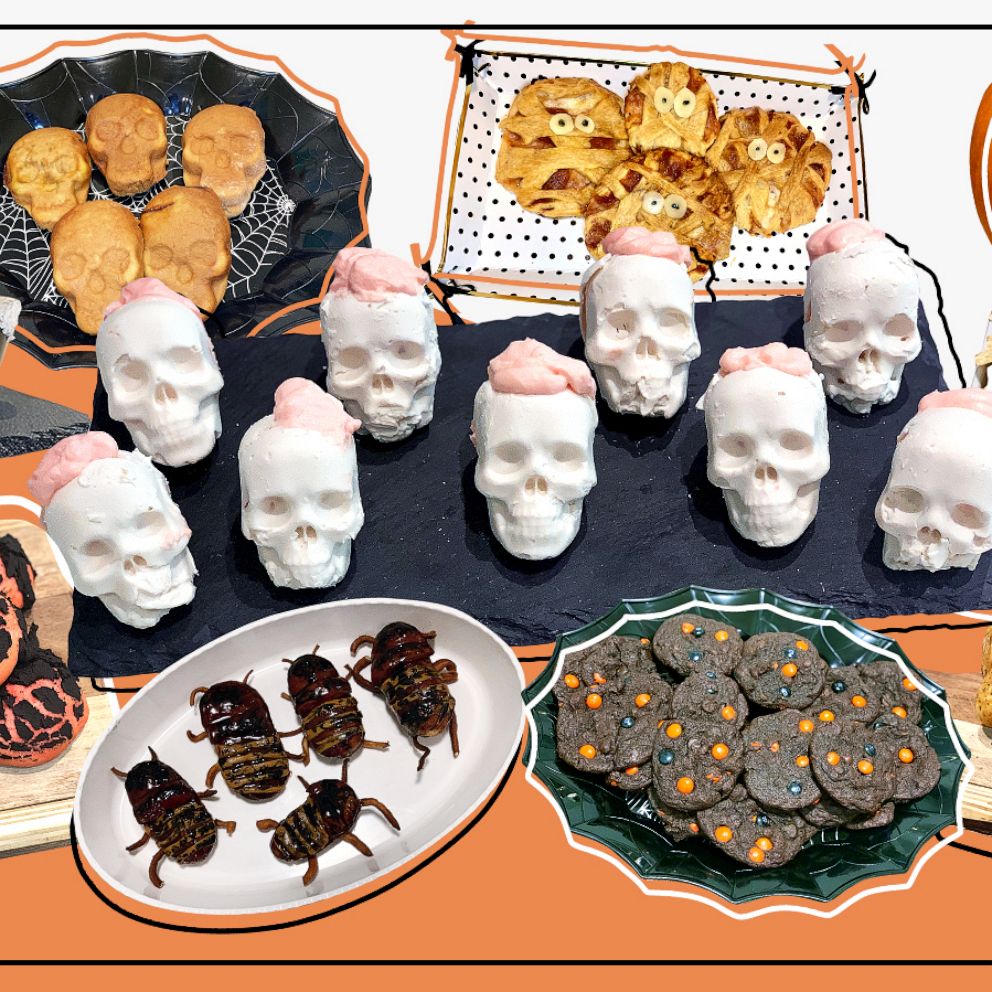
I couldn't find phyllo dough sheets at the grocery store, so instead I bought two canisters of Pillsbury's Crescent Roll Dough. This seemed to work very similarly, you just have to work around the perforated edges when shaping the mummy. The recipe was pretty easy to make overall. You just wrap your brie and jam in dough and then wrap it in strips to look like a mummy. Truthfully it was one of the easiest recipes I made this year!
If I were to remake this recipe, I would likely use less dough to wrap the mummy initially before covering it in strips. I feel my brie was too doughy and it took a bit of maneuvering to get to the actual cheese. The dough, brie and raspberry jam combo is rather delicious.
Ingredients
- 2 sheets of puff pastry
- 1 8 oz. wheel of Brie
- 3 Tbsp raspberry jam
- 2 whole almonds
- 1 egg beaten
Directions
- Preheat oven to 400 degrees F.
- Line a baking sheet with parchment paper and place one sheet of phyllo dough on it.
- Add jam to center of dough and place wheel of brie on top.
- Cut puff pastry to a circle about 3 inches larger than the brie.
- Wrap the pastry around the brie, pressing edges closed. Turn brie over.
- Cover with egg wash.
- Cut remaining sheet of pastry into 3/4 inch strips.
- Cover brie with strips, wrapping it like a mummy and cover with egg wash.
- Add almond eyes and bake for 20-25 minutes or until golden brown.
- Serve with crackers.
Recipe reprinted courtesy of Stacey Garska Rodriguez at In The Kids Kitchen.
Screaming Ghost Donuts
Recipe IRL:
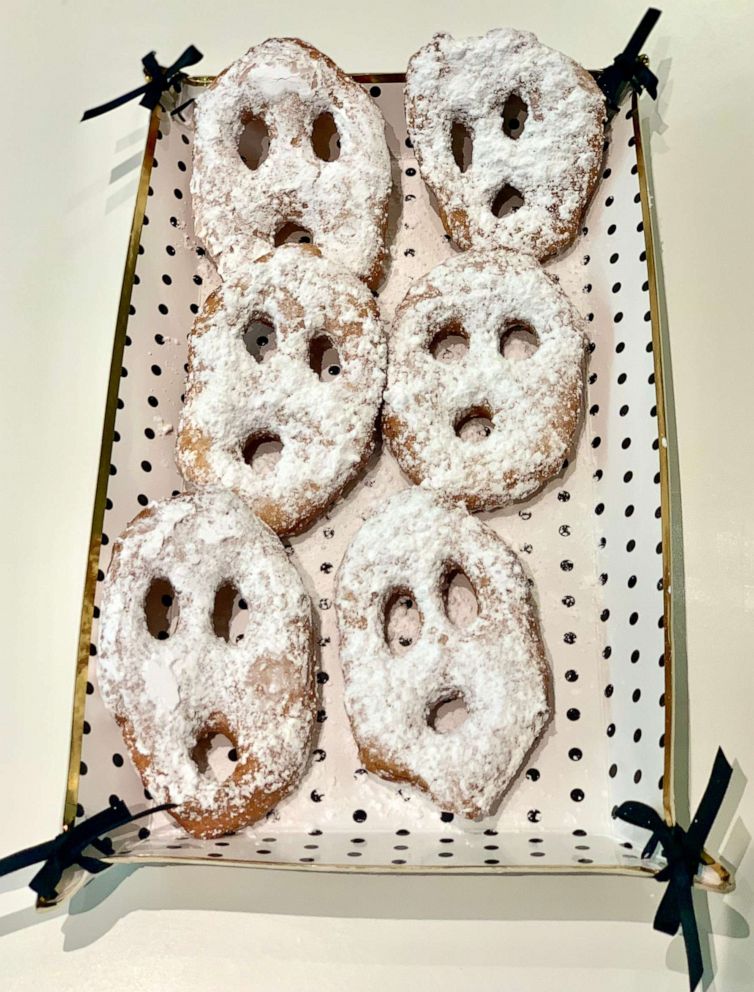
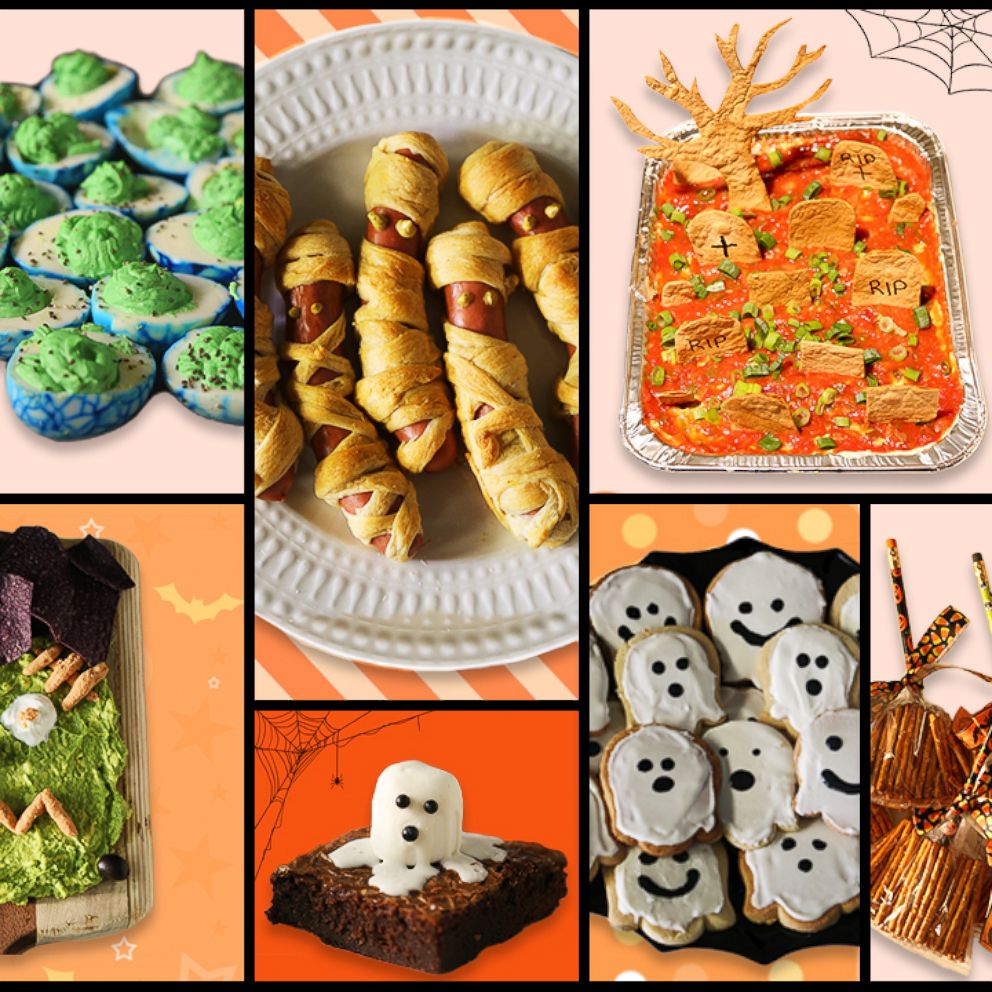
The making of this recipe was one of the most kid-friendly of the bunch. I used Pillsbury Grands! Homestyle Buttermilk Biscuits dough to make these and they turned out delicious. All you have to do is separate the biscuits, roll it out with a rolling pin, punch holes for the eyes and mouth and then roll them out a little more. I used a really tiny cooker cutter to make the cutouts, but the creator of the recipe used the back of the cap of food dye to punch the holes.
The only non-kid-friendly part is actually frying them in a vat of hot oil. I set my oil a little too high so while the donuts looked done, some were a little too doughy on the inside. This the kind of Halloween treat that's best if you eat it immediately so I suggest frying them up right before you plan to eat them.
Ingredients
- 1 tube refrigerated biscuit dough
- oil for frying
- powdered sugar
Directions
- Heat oil over medium heat to 350-375 degrees.
- Roll each piece of dough into an oblong shape and cut 2 eyes and a mouth with small round cutters.
- Carefully lower each "ghost face" into the oil and fry until golden on each side.
- Remove from oil and drain on paper or a rack.
- Once mostly cool, dust donuts with a liberal amount of powdered sugar.
Recipe reprinted courtesy of Heather Likes Food.
Halloween Cheesecake Bars
Recipe IRL:
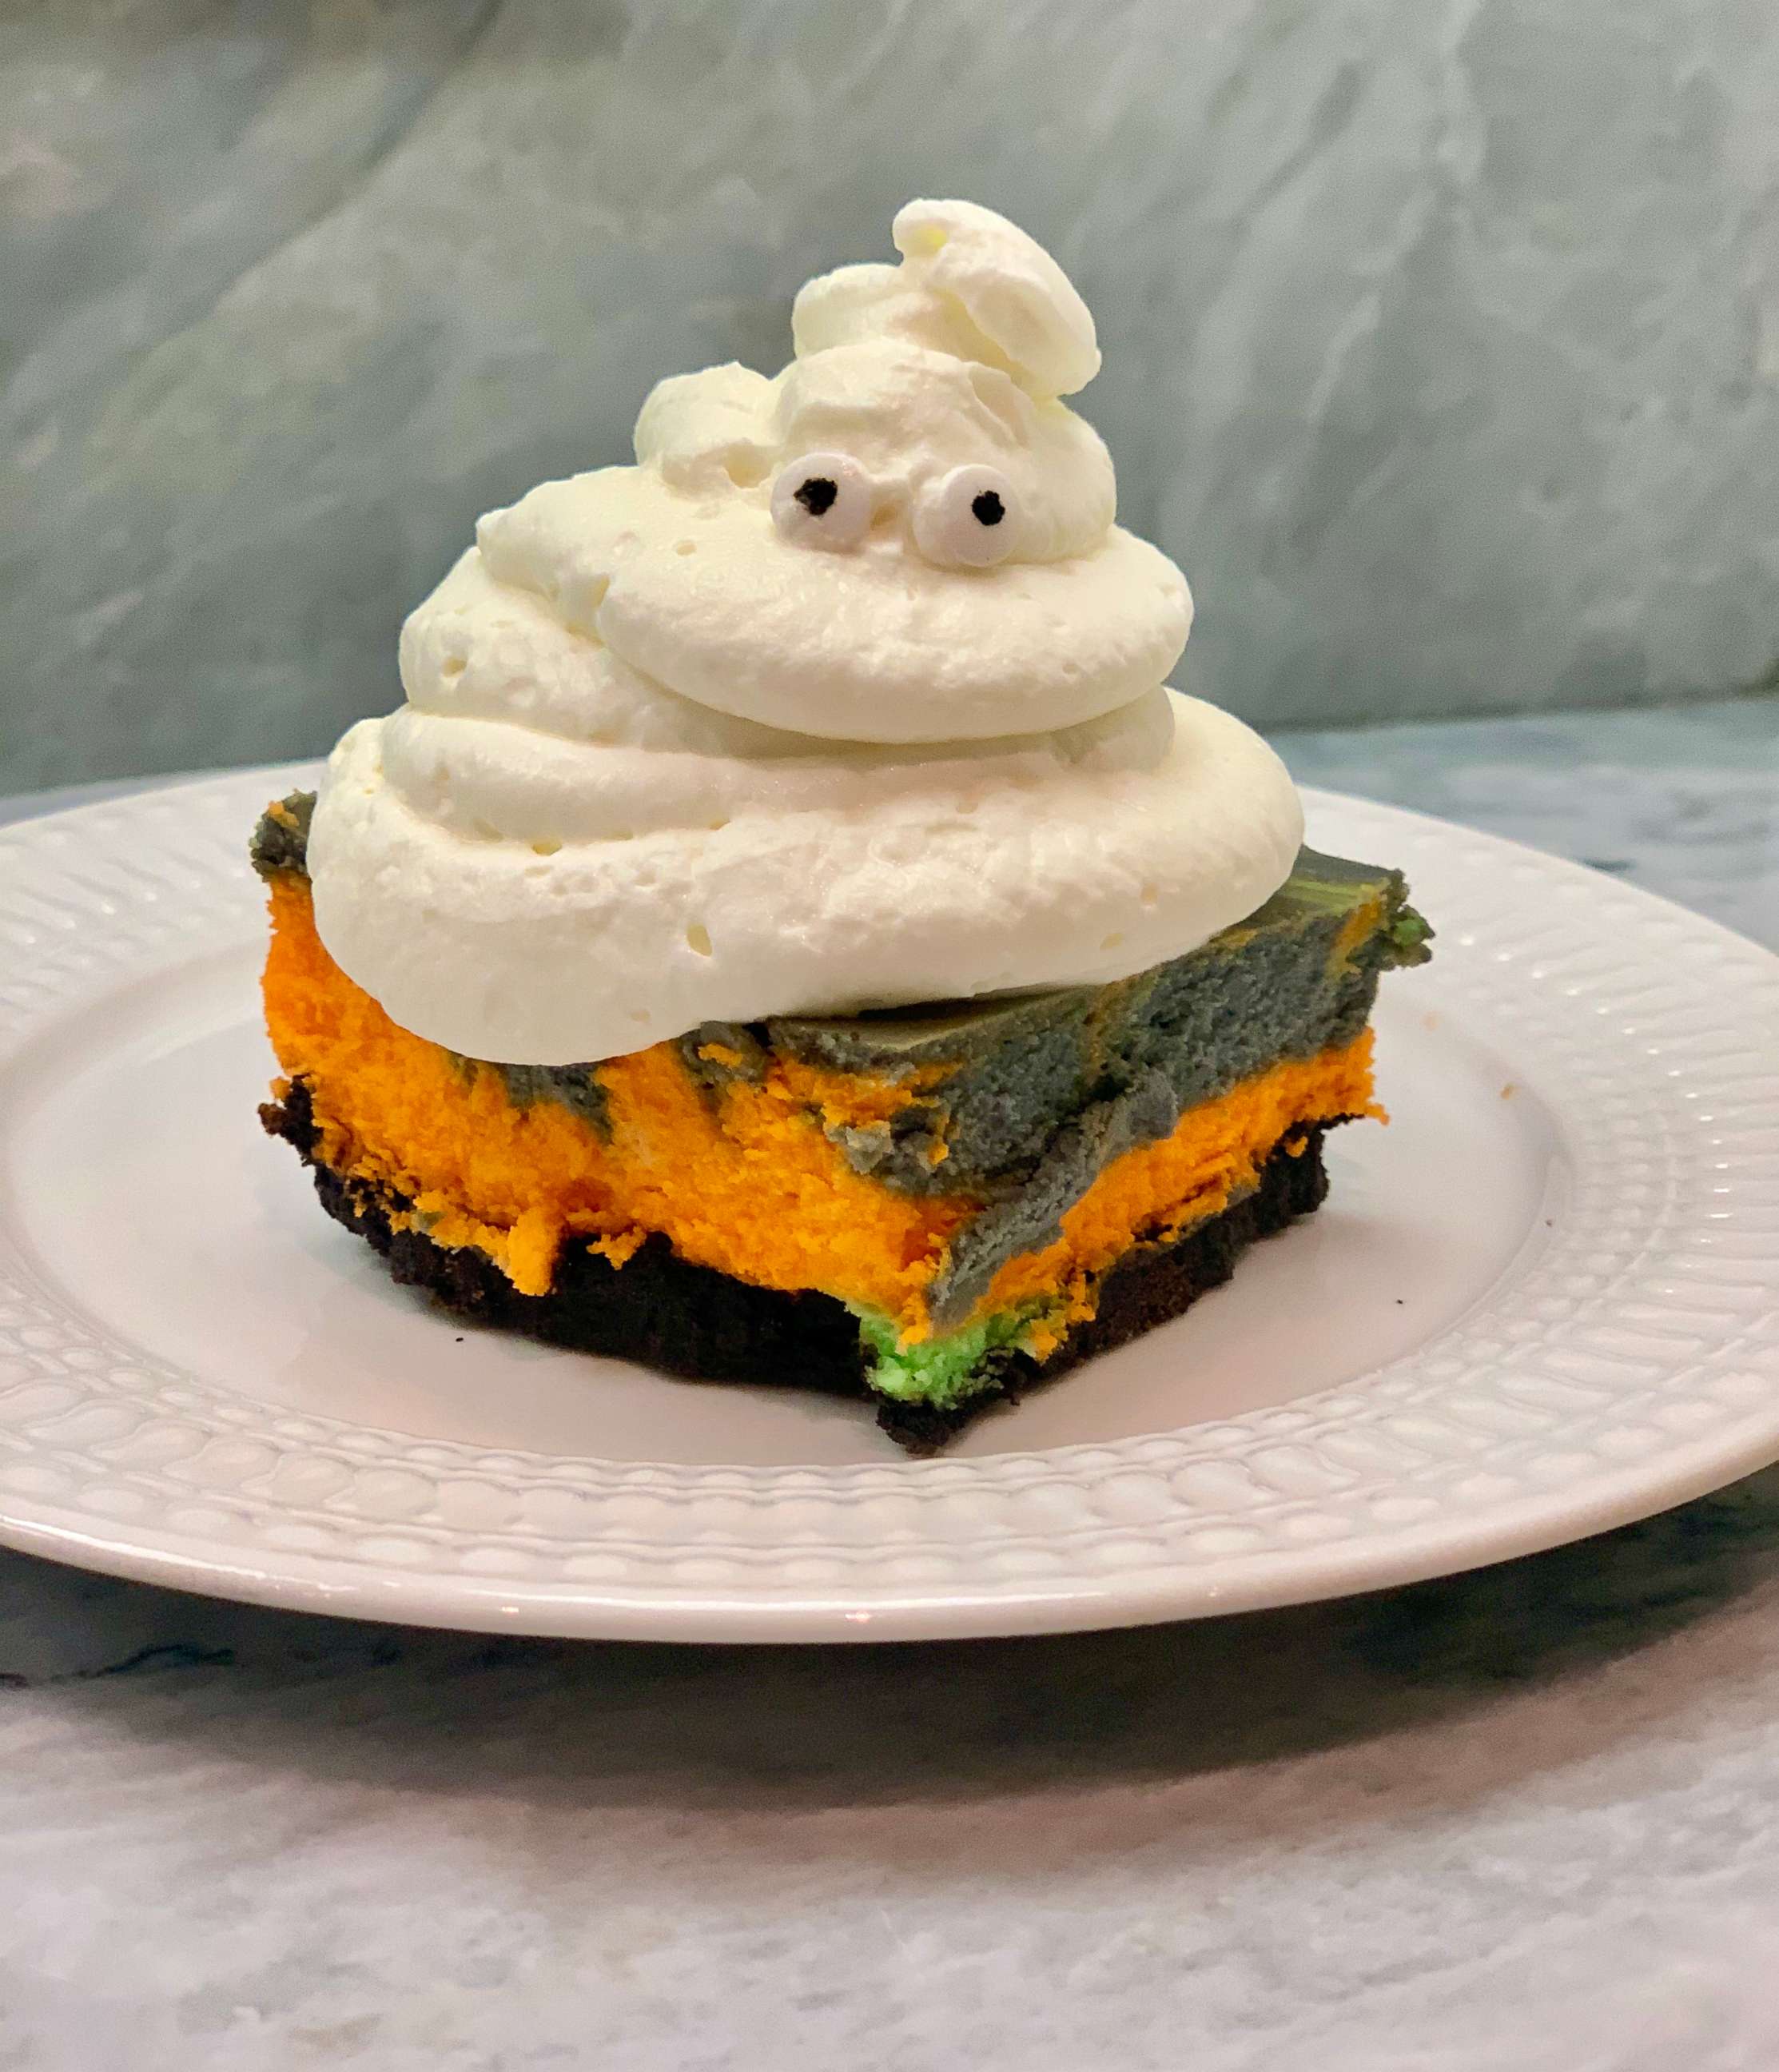
This recipe was so creamy and delicious. Often when I make cheesecake it breaks during the cooling process, but this one didn't. I don't have a food processor so I used my Ninja blender to crush the Oreos instead for the crust and while it was a little more time consuming than a food processor would have been it worked just fine!
For the cheesecake batter, I used gel food dye as the recipe calls for to tint the batter. I didn't have any more red food dye to mix with blue to make purple since I used it all in the Zombie Guts Cinnamon Rolls recipe below, so instead I dyed that part of the batter gray. I wished I'd just stuck with a brighter color like yellow because it ended up overpowering the other colors and looking rather ugly. I'd suggest using whatever primary food dye colors you do have. My swirl technique when it came to mixing the batter on top of the crust could have used some work too.
Cooking the cheesecake was rather easy, it was waiting for it to chill in the refrigerator for four hours that was hard! I was also too impatient to chill the mixing bowl before making the homemade whipped cream, so it ended up taking longer than I'd like to thicken. The end result was unBOOlievably delicious. Truly one of the best cheesecake recipes I've ever made. If you plan on remaking this recipe, I'd suggest using frosting instead of homemade whipped cream on top. I imagine the whipped cream would melt if left out for too long. I'd also suggest freezing the plate that you are going to use for plating, so the cheesecake stays fresh as long as possible.
Ingredients
Crust
- 30 Oreo cookies
- 4 tablespoons melted unsalted butter
Cheesecake
- 3 (8 oz) packages cream cheese, softened
- 1 1/2 cups sugar
- 3 tablespoons sour cream
- 1 1/2 teaspoons vanilla extract
- 3 tablespoons all-purpose flour*
- 3 large eggs
- Orange, purple, and green gel colors
Whipped Cream
- 2 cups heavy cream
- 1 cup powdered sugar
- 48 candy eyes
Directions
- Preheat oven to 325°F degrees. Spray a 9x13-inch pan with nonstick baking spray.
- Crush Oreos in a food processor. Stir in butter. Press evenly into bottom of prepared pan. Bake 10 minutes, then remove and cool.
- Place a large rimmed sheet pan on bottom rack of oven and fill halfway with water.
- Beat cream cheese and sugar until creamy. Add sour cream, vanilla, and flour and beat again.
- Add eggs one at a time, mixing until incorporated. Do not over mix.
- Divide cheesecake batter evenly into 3 bowls. Use gel colors to tint batter.
- Spoon batter evenly over cooled crust, alternating colors. Use a butter knife to swirl the colors gently.
- Place cheesecake pan on the rimmed sheet with water and bake for 45 minutes.
- Remove and cool on wire rack 1 hour. Refrigerate 4-6 hours or overnight.
- Just prior to serving, pour heavy cream and powdered sugar in chilled bowl. Beat on high until fluffy.
- Use a piping bag and icing tip 1A to swirl whip cream on top of squares. Press candy eyes into each swirl.
Recipe reprinted courtesy of Jocelyn Brubaker at Inside BruCrew Life.
Zombie Guts Cinnamon Rolls
Recipe IRL:
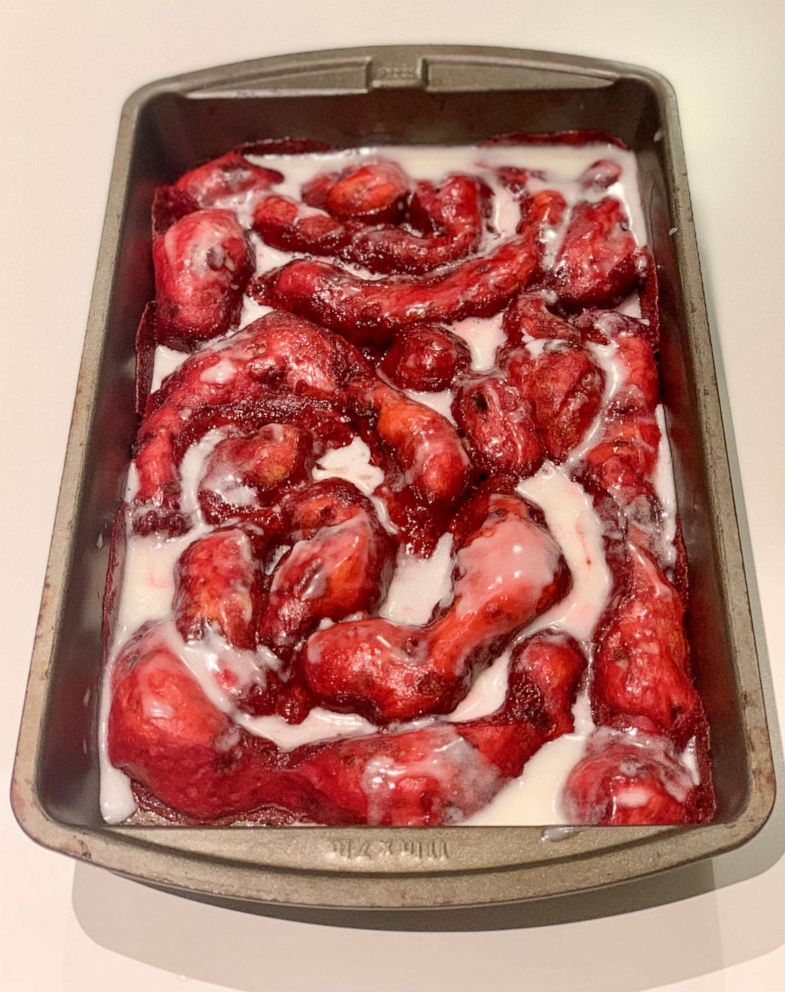
Now this is one fleshtastic recipe that is sure to be a talker! Instead of following this recipe line for line, which I usually do, I took inspiration from it in order to make a modified Zombie Guts Cinnamon Rolls recipe. I wanted to see if this recipe could be recreated with refrigerated Pillsbury Cinnamon Rolls dough, half and half, and red food dye.
I personally make cinnamon rolls from scratch much too regularly to admit, but I know that using yeast and waiting for time for rolls to rise is enough to make any novice baker -- or busy parent -- shy away from making a recipe. What I did instead was pop the uncooked and peeled apart cinnamon buns in a cup of half and half that I dyed very liberally with red food gel. Whenever I make homemade cinnamon buns I always pour some heavy cream or half and half right on top of the buns before I put them in the oven because it helps to keep them moist so that's where I got the idea from. I let the buns sit in the cream overnight but I don't think you need to wait that long for the dye to take. Then I arranged them in a baking pan to look like guts, tossed the extra red cream, and baked them. You be the judge if the end result looks enough like guts but to me it's definitely passable! Overall this was a much easier alternative with a similar result!
Ingredients
- 2 tsp active dry yeast
- 1 tbsp brown sugar
- 1 ¾ cup warm water
- Pinch of salt
- 1 tsp red food coloring
- 1.5 cups red velvet box cake mix (dry)
- 2.5 cups flour
Filling
- ⅓ cup melted butter
- 1 cup brown sugar
- 1/2 teaspoon cinnamon
Glaze
- 1 cup powdered sugar
- 1-3 tsp milk
Directions:
- Combine yeast, brown sugar, and warm water in mixer bowl. Whisk thoroughly and sit for at least 5 minutes until bubbly.
- Add in salt, box cake mix, optional food dye and flour a little at a time, mixing in between with a dough hook until you have a dough texture.
- Scrape the sides, roll into a ball, cover, and let rise for 1 hour.
- After an hour, flour a large surface and knead for a few minutes, then roll out into a large rectangle. Cut sides that are uneven.
- Mix together melted butter and brown sugar, and sprinkle over dough. Sprinkle cinnamon as evenly as possible. Flatten with a rolling pin.
- Roll up into one long roll, then cut every 2 inches. Once rolled, unroll each of them and fold in half.
- Arrange in a greased 8x8 inch baking dish so that it looks like “guts." Cover and let rise another 45 minutes.
- While dough rises, preheat oven to 350°F.
- Remove cover from dough and bake at 350°F for 25 - 30 minutes.
- Once finished cooking, whisk together glaze ingredients in a medium mixing bowl and drizzle over rolls.
Recipe reprinted courtesy of Leigh Anne Wilkes at Your Home Based Mom.
Easy Jack-o-lantern Cheese Quesadillas
Recipe IRL:
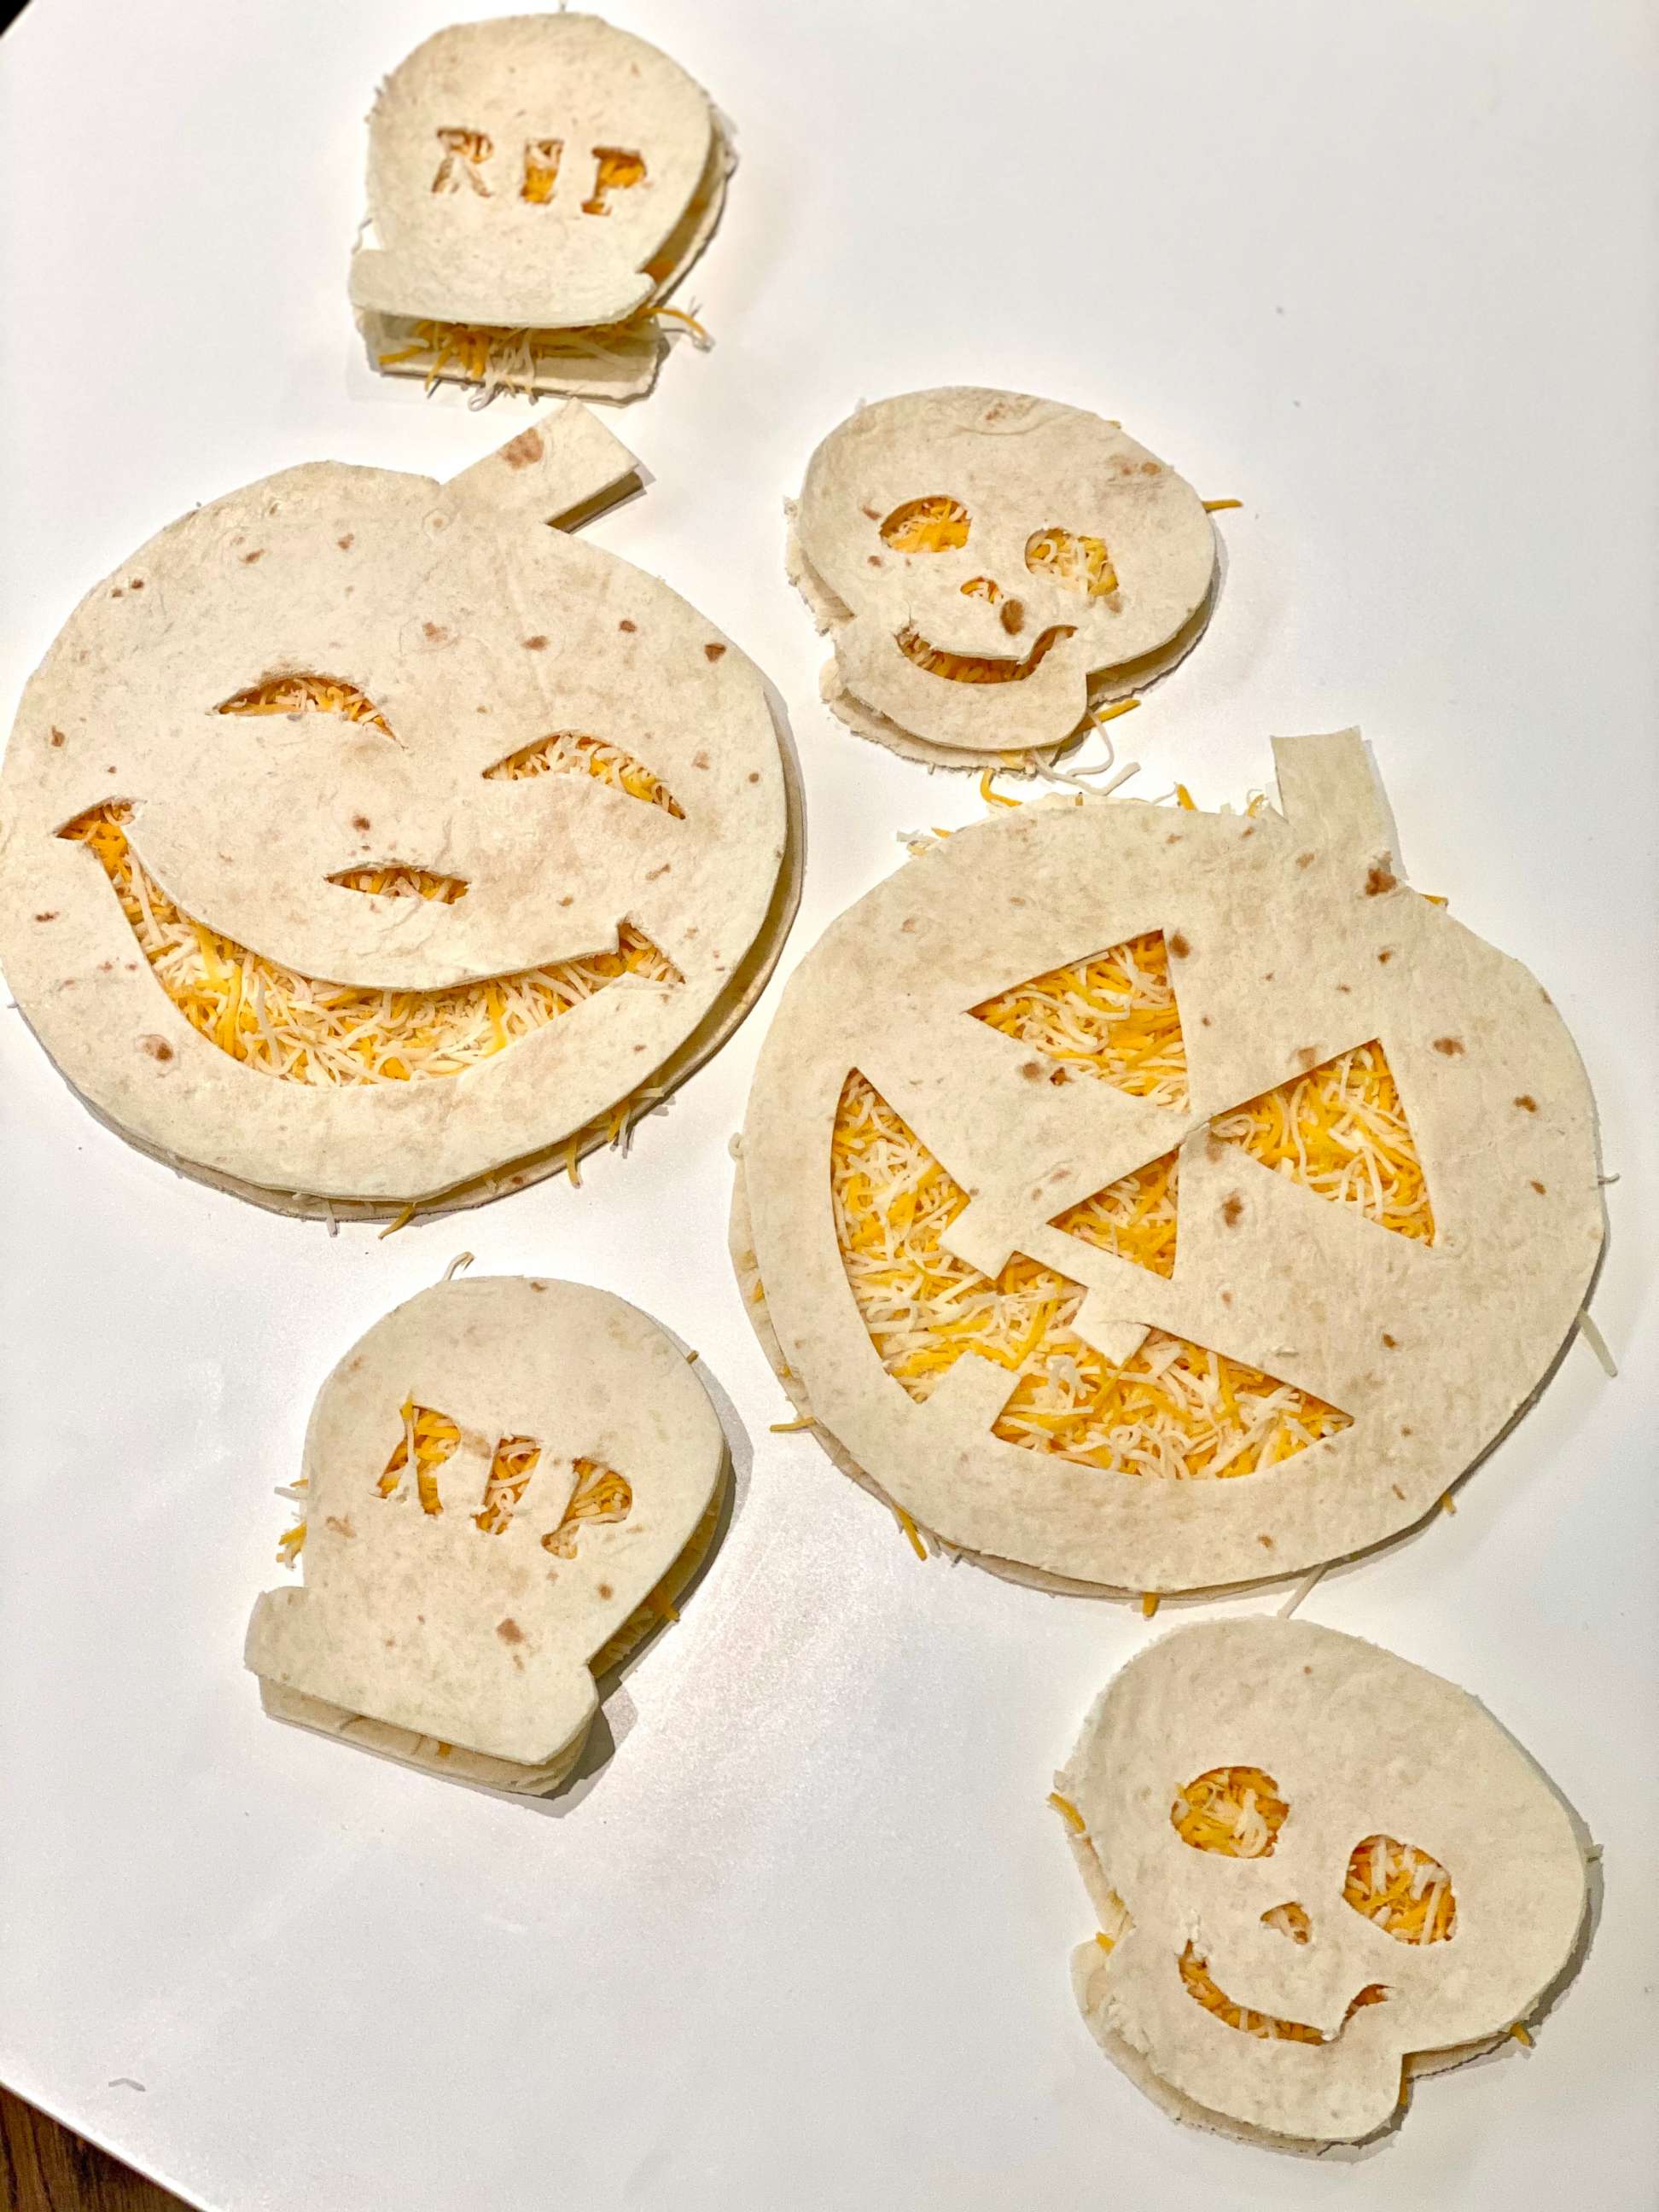
This two-ingredient recipe was the easiest of the bunch. All you have to do is cut tortillas in the shape of pumpkins and top with cheese! I took some liberties from this recipe and used cookie cutters to make gravestone and skull-shaped quesadillas in addition to the jack-o-lantern ones. I started out using a food marker to draw the lines and then a sharp knife to make the cuts but I find free handing it is easier and faster and leaves room for creativity. This Jack-o-lantern Cheese Quesadilla recipe would go rather well with the Spiderweb Taco Dip. I usually pan fry my quesadillas so making them in the oven was a change for me. It was so much easier than pan frying that I think I'm going to always make my quesadillas this way going forward. This is definitely a fun one.
Ingredients
- Flour tortillas
- Shredded cheese
Directions
- Preheat the oven to 400F.
- Stack 2 flour tortillas on top of each other. Use a kitchen knife to cut out a pumpkin "stem" from them.
- Set one of the flour tortillas aside. Cut a face out from the middle of one of the tortillas. You can plan your face by scratching out the shapes with a toothpick before you cut, if you like.
- Set the tortilla without a face on a baking sheet. Cover it with cheese.
- Add the other flour tortilla on top of the cheese, making sure the stems line up.
- Bake in the oven at 400F for about 10 minutes, or until the cheese is melted and the edges start to turn golden.
- Serve with sour cream and salsa.
Recipe reprinted courtesy of One Little Project.
Happy haunting, ghoulfriends!
Editor's note: This was originally published on Oct. 1, 2020.
